 |
| Glory Bee and Suzanne sharing a moment! |
Suzanne has been searching high and low for a tasty cheese with a short aging time. This month she found it and she vows she will never let go.
Just in case you don't know Suzanne, you can always meet her at her wonderful website- Chickens in the Road. While you're there, check out her giveaway. (Note: This month's giveaway is closed. Look for next month's on June 15th.)
 |
| Suzanne milking Beulah Petunia, Glory Bee's mother |
Make It Quick with Caerphilly
By Suzanne McMinn at Chickens in the Road
http://chickensintheroad.com/cooking/make-it-quick-with-caerphilly/
Caerphilly (pronounced CAR-filly) is a cute little town in Wales with a massive 13th-century castle. It’s also a cute little cheese that is aged in less than 3 weeks. That’s even quicker than Farmhouse Cheddar! [Insert Suzanne throwing Farmhouse Cheddar recipe out window.] Actually, Caerphilly is a farmhouse-style cheese and has some things in common with Farmhouse Cheddar, including the short aging time and the cheddar-like qualities. It is a creamy but sharp cheese that originated as a staple in coal miners’ lunch pails. It wasn’t made in Caerphilly, but was sold at market there, giving it its name.
Several people have suggested Caerphilly to me recently. There is Caerphilly in the air! I decided this must be my next cheese in my cheese challenge for New England Cheesemaking!
In researching Caerphilly recipes, I found the most common recipe sprinkled about the internet on cheesemaking blogs is one adapted with slight variations from Making Artisan Cheese by Tim Smith. You can read an excellent post about that recipe here on the New England Cheesemaking blog (with videos) (click here). Like most cheeses, there’s more than one way to make a Caerphilly cheese, so I chose to tackle a recipe I found in 200 Easy Homemade Cheese Recipes, intrigued by this recipe’s inclusion of aroma mesophilic. The recipe in this book was for four gallons of milk. You can’t always just cut a cheese recipe in half, so I consulted with New England Cheesemaking and relied on their advice in adapting this recipe to the size most preferred for the average home cheesemaker who doesn’t want to make a mammoth cheese. Some of the instructions in this book were also on the vague side. Again, I relied on the cheesemaking experts at NEC to steer me in the right direction (info@cheesemaking.com).
If you’ve never tried Caerphilly, you could start with either this recipe or the Tim Smith version you can find at the NEC post (link above). If you’ve already tried the Tim Smith recipe, do give this one a whirl! With the addition of the aroma meso, it’s a creamier, more buttery take on Caerphilly.
If using store-bought pasteurized milk, for a two gallon recipe, you may want/need to add 1/4 teaspoon calcium chloride diluted in 1/4 cup cool water to the recipe. This will help the curds to set properly. See more about milk for cheesemaking here.
How to make Caerphilly:
2 gallons whole milk (cow or goat milk)
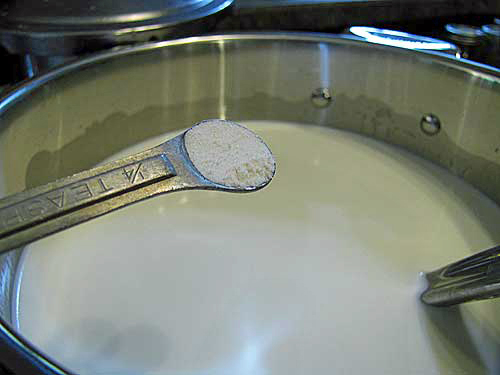
1/4 teaspoon direct-set mesophilic starter
1/4 teaspoon flora danica*
1/2 teaspoon liquid rennet (or 1/2 rennet tablet) diluted in 1/4 cup cool, unchlorinated water
cheese salt for brine
*You can use all regular mesophilic starter instead of half and half with the flora danica, but adding a portion of this special mesophilic starter (also known as aroma mesophilic) will give you a lighter texture and more butter-like flavor.
One-quarter teaspoon is approximately half of one of the little direct-set mesophilic packets. Carefully stir up the contents of the packet before measuring out the starter to be sure you get an even distribution of the culture.
Step 1. Heat the milk to 90-degrees F, stirring gently. Turn off heat.


Step 3. Add diluted calcium chloride, if using.
Step 4. Make sure temperature is 90 degrees. Add heat briefly if necessary. Add diluted rennet, stirring gently with an up-and-down motion. Cover and let sit for 45 minutes or until the curds give a clean break.
Step 5. Cut curds into 1/2-inch cubes. Let curds sit for 5 minutes.
It’s always difficult to get a photo of what “clean break” is. Here, I lifted some curds with a slotted spoon.

Step 6. Return pot to low heat and warm curds to 95-degrees, stirring gently and continuously. This should take 30 minutes. Adjust heat as necessary to make sure it takes the entire time to reach 95. Do not heat too quickly. Turn off heat; cover and let sit for 45 minutes. When you look again, you’ll see the curds have been expelling the whey. The first time I ever saw curds and whey, I felt like I’d done a magic trick.

Step 8. Line a 2-pound mold with cheesecloth and fill with curds. Press at 10 pounds for 30 minutes.


If you’re not sure if your cheese is pressed adequately, checking the weight is a guide.

I’m slightly obsessive about cheesecloth imprints, so I usually put my cheeses back in the press for an hour or so–without cheesecloth–at the end of the pressing time just to smooth out the wrinkles a bit.


Step 10. Make a brine using cheese salt and cold water. The standard measurements for a brine are one gallon of water to 2 pounds of cheese salt. I make a reduced quantity of brine using that same ratio. (You could either make a full size brine and re-use it for more cheeses, or make a reduced brine based on the same ratio so that you aren’t using so much cheese salt. I prefer to not store brine since my fridge space is at a premium, so I take the latter approach.) Soak cheese in the brine solution for about 24 hours, turning once.

Step 12. Wax, or allow to develop a natural rind. Age at 50- to 54-degrees for 2-3 weeks.
Yield: 2 pounds.
My experience: Caerphilly is an even quicker alternative to longer-aged cheeses than Farmhouse Cheddar. I think it has more flavor than Farmhouse Cheddar, and a nicer consistency. (Moist, like a Gouda, not crumbly like Farmhouse Cheddar.) It only takes a couple of hours to go from the pot to the press, so what’s not to love? Leaves were historically used to wrap many cheeses to protect cheese during aging and transport. Caerphilly was often wrapped in cabbage leaves, so that’s what I did with mine.


It’s a cheese pretty enough to kiss!


Suzanne's Giveaway (Closed)
To help you get started making cheese, New England Cheesemaking is providing a package including (value of each item in parentheses): a hard cheese mold ($15.95), mesophilic culture ($5.95), veal rennet ($6.50), flora danica culture ($15.95), cheesecloth ($5.95), cheese salt ($2.95), and calcium chloride ($4.95). The total value of the package is $58.20. Note: This giveaway is open to U.S. residents only. (P.S. Or at least a U.S. shipping address. You can have a friend or relative send it on to you if they have a U.S. shipping address.)
For a chance to win: Leave a comment on Suzanne's post and let her know you want it. ONE winner will be drawn by random comment number to receive the package. Eligible entry cut-off is midnight Eastern (U.S.) time tomorrow night (May 16). This post will be updated with the winner by 9 a.m. Eastern (U.S.) time on Tuesday (May 17). Return to this post to claim your prize!
Yummy! We love cheese-kids, cats, and me (i even have a horse who will beg for some!)!
ReplyDeleteKirsten Ammeen
kirstenammeen@mac.com
Thank you so much for the inspiring recipe. I cannot wait for my seasonal milking to start. We have four goats but living in Northern Vermont, organize it to have our kids by the end of May to make it easy on the baby goats. We have made chevre with all kinds of flavoring for the last 8 years. I have been hankering for another easy-to-make cheese, being intimidated by the longer process of hard cheeses. The Caerphilly recipe seems just the ticket. I am definitely trying it out this summer and hope for success. Impatient for the frolicking kids in the meadow and the pasteurizing/dairy room to be back in business, a sure sign of warmer season, lucie
ReplyDeleteNice cabbage cheese! Am making a cheese press and those molds would work great! I would dearly love that basket of goodies from New England Cheesemaking...
ReplyDeleteI have to try this! I would love to win the kit; I only have some of the ingredient on hand so it will have to wait until I win or buy what I need.
ReplyDeleteYou have got me hooked on wanting to learn cheesemaking Suzanne! I am slightly confused or rather need to understand why the use of both rennet and a mesophilic culture? I always thought rennet was all that was needed for making cheese.
ReplyDeleteAnd yes, I do hope to win this giveaway! Am carefully considering buying the cheese press you use. But gosh, it's expensive!
Thanks for the great info! We have just started experimenting with cheese making and have found your site so helpful. I would love to win the giveaway, but either way, thanks for sharing your wisdom.
ReplyDeleteHadley Barnard
Hadley.Barnard@gmail.com
This is just a reminder, folks, that you have to go to Suzanne's website- Chickens in the Road, to win the giveaway. Good luck!
ReplyDeleteI just got done making my first two pressed cheese. First was Farmhouse Cheddar,I cut it in half and am eating one, is pretty good, the other half, aging, Think I will try it in the 3 weeks. The last one was caerphilly, tomarrow it will have finished its first week, now after reading about it I am really interested in trying your recipe. I am really enjoying cheese making.Please put me in your give a way.
ReplyDeleteBeth
redrose@clearwire.net
Mine is in the brine looking yummy!
ReplyDeleteI just started making cheese. Caerphilly was the one I really liked. It was ready in a short time and it only takes a little while to go from start to press. The only trouble I ran into was storage while it ages. My basement is the right temperature but I have cats and no way to keep them from being down there. I don't know if my solution will help anyone else but Tupperware is selling a container made just for cheese. It has venting to allow the cheese to breathe and my cats can't get into it. It holds a two pound wheel like the recipe Suzanne demonstrated, and it really does the trick! I found it here in a flyer on the KitchenCharmer.com website. http://kitchencharmer.com/wp-content/uploads/2011/07/MidJune11-Flyer2.pdf Page 5 in the lower left corner, called the CheeseSmart Small. I don't know if they have a large but I've got four of them and they're great!
ReplyDeleteAre we talking uk gallons or us ?
ReplyDeletethank you.
US
ReplyDelete